How to Convert a Word Document to a Fillable PDF Form
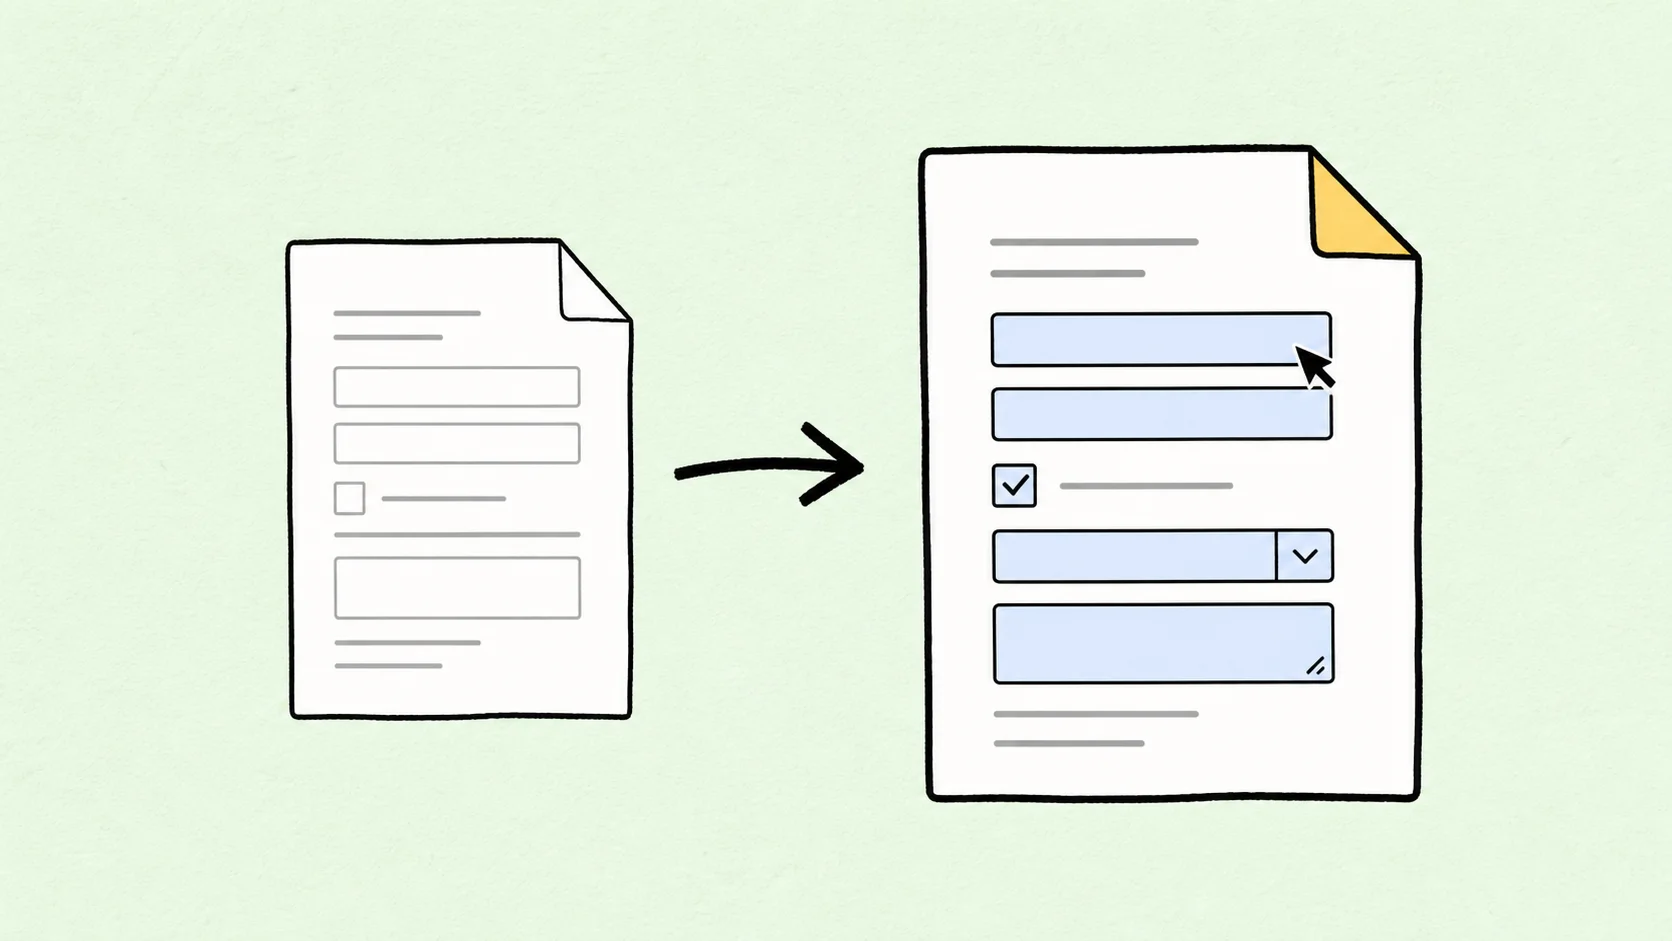
Converting a Word document to PDF creates a fixed-layout page, but it does not automatically create fillable text boxes, checkboxes, dropdowns, or signature fields. The reliable workflow is to design the form in Word, export a standard PDF, open that PDF in a form editor, add the interactive fields, and test the finished form.
For a simple form, the process takes four stages: prepare, export, add fields, and validate. Keeping those stages separate prevents a common mistake—sending a PDF that looks like a form but cannot actually accept typed responses.
Static PDF vs. Fillable PDF
A static PDF preserves the visible content of the Word document. People can read, print, annotate, or sometimes edit it with PDF software, but blank lines and empty squares are only page graphics. Clicking them does not create a cursor or store a response.
A fillable PDF contains interactive form fields placed on top of the page. Those fields can collect and save information such as:
- Single-line or multiline text
- Dates, phone numbers, and numeric values
- Independent checkbox selections
- One choice from a radio-button group
- One or more choices from a dropdown or list
- Digital signatures or e-signature requests
- Calculated values, depending on the form editor
Microsoft Word can create forms that users complete inside Word. Its form creation guide documents content controls for text, checkboxes, dates, and dropdowns on the Developer tab. Those Word controls are useful when the final file remains a .docx, but you should not assume that ordinary PDF export will turn them into equivalent PDF form fields.
If the recipient needs to type directly into the PDF and save the answers, you need the form-editor stage after conversion.
Prepare Labels, Tables, and Spacing in Word
Treat Word as the visual design layer. Build a clean form that makes field positions obvious to both people and automatic field-detection software.
Use clear labels
Put a concise label next to every expected answer, such as Full name, Email address, Start date, or Reason for request. Avoid relying only on placeholder text inside a future field because labels remain visible after a user enters data and are more useful for accessibility.
Mark required questions consistently. An asterisk can work if the form also explains that * means required. For instructions, say what format you expect—for example, YYYY-MM-DD or Include country code—instead of leaving users to guess.
Build stable field areas
Tables are often more stable than repeated spaces, underscores, or tab characters. A borderless two-column table can keep labels aligned with answer areas, while visible table borders can create boxes that the PDF editor may detect as fields.
Use intentional row heights and cell padding so typed text will fit. Leave more vertical room for addresses, explanations, and other multiline answers. Do not make a field so narrow that a normal email address or phone number will be clipped.
Choose the correct control pattern
Design the page according to the response you need:
- Use checkboxes when several answers may be selected independently.
- Use radio buttons when the user must choose exactly one answer from a group.
- Use a dropdown when a list is long and page space is limited.
- Use a text field when the response cannot be predicted.
- Use a signature field only when the workflow genuinely requires a signature.
You may use Word Developer controls while prototyping the form, but the visual labels and spacing still need to make sense after PDF export. Save a clean editable .docx as the source of truth before moving to the PDF stage.
Export the Word Document as a Standard PDF
Before exporting, update fields, accept or reject tracked changes, remove internal comments, and check page breaks, fonts, tables, and image placement. The form editor will add interactivity, but it should not be expected to repair the page design.
In Word for Windows:
- Select File > Save As and choose PDF, or use File > Export > Create PDF/XPS.
- Choose Standard when visual quality matters.
- Open Options and confirm the page range, markup, bookmarks, and accessibility settings.
- Save the PDF under a new name.
In Word for Mac:
- Select File > Save As or Save a Copy.
- Choose PDF under File Format.
- Select the destination and save the file.
For more export options, see How to Save a Word Document as a PDF.
If Word is unavailable, DeckFlow Word to PDF can convert an individual .doc or .docx file into the initial static PDF. DeckFlow does not add fillable form fields. You still need a separate form editor for the remaining steps.
Open the exported PDF before proceeding. Confirm that every label, box, line, and instruction appears correctly and that the page count matches the Word source. Fix layout errors in Word and export again rather than building fields on top of an incorrect PDF.
Add Text Fields, Checkboxes, Dropdowns, and Signatures
The exact controls depend on the PDF editor. In Adobe Acrobat, the documented workflow is All tools > Prepare a form, followed by selecting the existing document and choosing Create form. Acrobat can automatically identify static form areas and convert them into fields, but automatic detection is a starting point rather than a finished form. Adobe’s current Prepare a form instructions recommend reviewing, deleting, resizing, and rearranging the detected fields.
Use this general process:
- Open the static PDF in a PDF form editor.
- Start its form-preparation or form-field tool.
- Allow automatic field detection if available.
- Compare every detected field with the Word design.
- Delete false detections, such as fields placed over decorative lines or table headings.
- Add any missing text fields, checkboxes, radio buttons, dropdowns, date fields, or signature fields.
- Resize and align fields so they sit precisely over the intended answer areas.
- Preview the form, enter sample responses, and save an editable master copy.
Do not place a text field over a checkbox symbol or use separate checkboxes for an either-or question. Field type affects how answers behave and how exported data is interpreted.
For signatures, decide whether you need a simple signature request or a certificate-based digital signature. They are not interchangeable. Use the field type and distribution method required by your organization, contract, or compliance process.
Set Field Names, Validation, and Tab Order
A form can look correct and still be difficult to complete or process. Configure the field properties before distribution.
Give every field a meaningful name
Replace generic names such as Text1 and Check Box3 with stable names such as full_name, email, start_date, or marketing_consent. Meaningful names make exported response data easier to understand.
Use duplicate field names only intentionally. Some PDF editors mirror the same value across fields that share a name. That behavior is useful when a person’s name should repeat on several pages, but disastrous when unrelated questions accidentally share a field name.
Set behavior and formatting
Configure each field according to the expected response:
- Mark genuinely mandatory fields as required.
- Enable multiline input for addresses and long explanations.
- Set reasonable character limits where the document has fixed space.
- Add dropdown choices and confirm their export values.
- Group related radio buttons under one name with distinct choices.
- Format dates, numbers, percentages, phone numbers, or other structured inputs.
- Use validation to reject impossible values rather than merely changing their appearance.
Adobe’s form-field formatting guide distinguishes display formatting from validation and supports numeric ranges or custom validation scripts. Keep custom scripts simple, documented, and tested in the PDF viewers your recipients will use.
Create a logical tab order
Pressing Tab should move through the form in reading order: left to right, top to bottom, and then to the next page. It should not jump from the applicant’s name to a signature on the last page and then back to an address field.
In Acrobat, open Prepare a form, sort the Fields panel by Tab order, show the tab numbers, and choose row, column, structure, or manual ordering. Adobe’s form navigation guide explains these choices. Manual ordering is useful for complex layouts, but it must be rechecked after fields are added, removed, or moved.
Test the Fillable PDF on Desktop and Mobile
Do not test only inside the editor that created the form. Save a copy, close the editing tools, and complete the form as a recipient would.
Use a realistic test record and check:
- Every visible answer area has the correct field.
- Required fields behave as intended.
- Checkboxes can be selected independently.
- Each radio-button group allows only one answer.
- Dropdown lists contain the right choices in the right order.
- Long text wraps or scrolls without disappearing.
- Dates and numbers accept valid values and reject invalid ones.
- The Tab key follows a logical path.
- Entered responses remain after saving, closing, and reopening the PDF.
- Printing shows the completed values without clipping.
- Reset, submit, signature, or calculation actions work if the form uses them.
Then test the PDF in at least one common desktop viewer and one mobile viewer. Browser PDF viewers and mobile apps do not always support advanced calculations, custom JavaScript, signatures, or submission actions consistently. If broad compatibility matters, favor standard fields and simple validation over complex automation.
Check accessibility as well. Labels should be visible, color should not be the only indicator of required status, text should have sufficient contrast, and keyboard users should be able to reach every field. For public or regulated forms, include accessibility testing in the formal review process.
Create a Fillable PDF from Google Docs
Google Docs can provide the static layout, but downloading a Google Doc as PDF does not by itself create interactive PDF fields.
- Build the form layout in Google Docs with clear labels, tables, and answer areas.
- Review margins, page breaks, fonts, and table widths in print layout.
- Select File > Download > PDF Document (.pdf).
- Open the downloaded PDF and confirm that the static page is correct.
- Import that PDF into a form editor.
- Detect or add fields, configure their properties, set the tab order, and test the result.
Do not confuse Google Forms with a fillable PDF. Google Forms collects responses through a web form; it does not create an equivalent interactive PDF for offline completion. Choose Google Forms when browser-based data collection is the real goal, and choose a fillable PDF when recipients need a portable file they can save, sign, print, or complete offline.
Frequently Asked Questions
Can Word create a fillable PDF without Adobe Acrobat?
Word can create a form that is fillable inside Word and can export a static PDF. Creating interactive PDF fields requires a PDF form editor or another conversion workflow that explicitly supports PDF form fields. Acrobat is one option, but it is not the only PDF form editor.
Are there free tools for converting Word to a fillable PDF?
Some desktop and browser PDF editors offer free form-field features or limited free usage. Before uploading a document, check whether the tool supports the field types, saving, signatures, validation, and file size you need. Review its privacy policy and your organization’s rules before using sensitive personal, medical, legal, or financial information.
What is the difference between a writable PDF and a fillable PDF?
The terms are often used interchangeably. In practice, a fillable PDF contains defined form fields with predictable behavior. A PDF may also be “writable” because an editor lets someone place text annotations anywhere, but those annotations are not structured form data and may be harder to validate or export.
Can I password-protect a fillable PDF?
PDF software may offer passwords or permission controls, but those settings do not replace a secure collection and storage process. Test that intended recipients can still fill and save the form, and do not rely on a field’s password-style display to protect the underlying submitted data.
What does flattening a fillable PDF do?
Flattening turns field appearances into regular page content so the values are no longer editable as normal form fields. It can be useful for a final archival or sharing copy, but it removes interactivity and may affect data extraction or accessibility. Keep an unflattened master form and an unflattened completed copy before creating a flattened version.
Related Reading
- Learn the standard conversion methods in How to Save a Word Document as a PDF.
- Combine several source files before building the form with How to Combine Multiple Word Documents into One PDF.
- Create the initial static PDF online with DeckFlow Word to PDF.